Showing posts with label DIY. Show all posts

DIY Caramel Frappuccino!

Tuesday, May 27, 2014

Nail color -KARDASHIAN KOLOR Nail polish (All Kendall-ed up) By OPI

I LOVE starbucks frappuccinos, but I do not love paying for them. Here is my DIY frappuccino recipe.  


You'll Need
Instant coffee or instant espresso
Vanilla almond milk(I prefer to use Silk brand)
Your favorite Ice cream(I like to use caramel)

If you would like to keep this drink dairy free use coconut milk ice cream!

How to
Mix 1-2 tsp of instant coffee with 3/4 cup boiling water.
Add 3/4 cup vanilla almond milk.
Add one scoop of ice cream.

Chill in the fridge for at least 25- 30 min

Starbucks at home, it's as easy as that! 
To make this even more heavenly top with a little whipped cream and caramel syrup.


DIY Wall Art!

Wednesday, May 7, 2014

Cheap & Chic DIY Wall Art Idea!

My gorgeous floral patterned fabric finally arrived(from Spoonflower). I've been anticipating the arrival of this fabric for weeks!(and anxiously running to check the mail every day lol)  I am in love with the colors and plan on incorporating more of them into our living room soon.

Bright pink, blush, aqua, charcoal and mustard.
There are many fabrics to choose from I picked the organic cotton sateen.
You can actually order it as gift wrap or a wall decal as well. 

My original plan was to just wrap the fabric around a large canvas and hang it up as a large piece of art but seeing it in person I realized the pattern is just too small and repetitive for that idea.

When I previously posted this paper before(it comes in a fabric as well which was what I ordered) another blogger (Samantha from Playdates + Pearls) had previously suggested buying three samples and framing them for some cheap DIY art which is exactly what I plan to do!(with the fabric I already have)
Also check out Playdates + Pearls for more fab ideas from DIY to interior design, fashion, makeup and her weekly Lust list! I ♥ her blog. 

I purchased a yard of the fabric.

I found some frames on Ikea that I think would be perfect.  

This is not the finished product
I made this image to kind of predict what it should look like when it is finished.


My living room is painted a very similar color to the background kind of a Greige.

It is actually a Valspar paint that I had color matched to Benjamin Moore's Revere Pewter. 
Thom Filicia features some of his favorite paint swatches in his book Thom Filicia Style and I actually used the page to color match it at Lowes. Which btw is an amazing interior design guide! One of my favorites. I would die to have him design my home. Was I the only one who loved Dress my Nest?

What do you guys think?

Or do you think it needs something different featured in the middle to break up the pattern.

Like maybe this..

Made by girl LOVE Candy print

Like I need an excuse to order from Made by girl!

I have this print in Gold already : )

I'm also in the market for a new mascara!
Who has a good preferably drugstore brand Mascara that they would recommend?
Marc and I actually have a night out planned on Saturday(It's my birthday!) and my mascara needs to be replaced already! On a side note not really looking forward to turning 28 but oh well!

I plan to post a pic of my new ombre hair after the weekend since we are going out and I'll have someone to take the pic besides myself lol! 

I was using MAC's Haute & Naughty which I was obsessed with at first but it dried out very quickly!
Which is annoying.
Leave your fave mascara in a comment please!
Also one that holds a curl well would be greatly appreciated.
I am the queen of curled eyelashes(even at the beach) and could not live without my eyelash curler! Lol
Yes I get made fun of for it Don't worry! Haha


DIY M e n u B o a r d !

Friday, April 11, 2014


DIY Chalkboard Menu tutorial
and some H&M home decor!

This project has been on my to do list for quite a while but I finally completed it!
It really helps to eliminate the stress of having to decide what's for dinner by planning a weekly menu.  It saves money and makes food shopping quicker because I am WAY too indecisive to shop without a list! 
That way I can organize all my coupons and plan out my meals by what is on sale as well.

You'll need
Chalkboard paint
painter's tape
a pencil
Gold Spray paint(I used Rustoleum metallic gold)
a small roller 
 a paintbrush (the size you would use to do the edges on a wall)

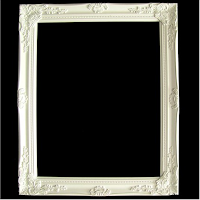
I bought a cream colored frame and spray painted it gold.
You could make it easier by purchasing a gold frame.(Or keep it as is)
I always have gold spray paint handy though!


Step 1 Hang your frame then trace the inside of the frame lightly with a pencil.
Remove the frame and use the pencil lines as a guide to lay down your painter's tape.

Step 2 Paint the edges with a brush and use a small roller to paint the rest.
Allow to dry.
I used valspar chalkboard paint

Step 3 Re-hang your frame.

You're done! Congrats now start planning your menu. 
Here are some of my fave sites for inspiration.

(lots of kid friendly delicious recipes)

Check out Megan's blog for recipe's and fab dinner menus! 
She posts her menu plan weekly on Mondays

Delish recipes with reviews! 
I've found tons of recipes on this site.

Leave some of your faves in a comment!


I know right!?


I made this one and intended to use it as a daily to do list, but have been using it for quotes instead.

I made the polka dots with a 1 inch circle punch.

This is like the house motto lol.(with three small children it's the only way to be!)

I recently bought a few candles from H&M and a new pillow cover! 
I was really excited to discover that they sell reasonably priced home decor.
I got 3 candles and a cushion cover.


Bedside table


The chair is from Marshalls
The first coffee table book I ever purchased!  Which btw I could use some new ones.
Any recommendations?


I love anything with some sparkle. The pillow is already getting a bit disheveled looking from the kids but it should hold up just fine otherwise.(because they are obsessed with it lol)

That is Luke's new bean bag chair from HSN.
My parents got it for him for his bday. It is the Perfect gift for a kid that needs sensory input. Luke loves it!  It is soo comfy too!

Have a fantastic weekend!


DIY pink peacock feather and gold confetti ornaments!

Tuesday, December 10, 2013

 I finally got around to making some Christmas ornaments and I love the way they turned out!  I went with a pink and gold theme.  I used pink peacock feathers and different sizes of gold sequins to fill clear ornaments that snap together.  I chose the acrylic ornaments over the glass(although I think the glass are prettier) because they are a little more kid friendly.  Judging by the fact that the boys accidentally drop every third or so ornament that they hang up on the floor lol.  Cole also happens to be a re-arranger.(Which most kids enjoy to do) I might make some more with faux flowers inside or possibly gold glitter.(Depending if I want to risk cleaning that up).  I think peonies or roses would be cute if they happen to fit! 

 
 Kate Spade Inspired Gold Confetti

 ♥  Peacock feathers!


 Gold Sequins

Baby Em admiring the twinkle lights 


DIY Pink shimmer plumping lip gloss!

Tuesday, November 19, 2013

  Make your own Plumping lip gloss aka Lip Venom!  All you Need is a Clear lipgloss, Peppermint Essential Oil, and a Shimmery pink eye shadow(I used Milani in Girls Luv Pink)
I used 5 pinches of the eyeshadow to tint the gloss a shimmery pale pink(Use more if desired) and used the gloss applicator to push the powder it into the bottle.  Then I filled it to the top with peppermint oil.  If you have a gloss you've already been using this will be easier to do because you will have more room to accommodate the oil. 
  
The more oil you use = more plumping power your gloss will have!

Why it works
The Peppermint Oil contains a natural blood flow stimulant which when applied causes lips to plump and appear fuller! You'll feel your lips tingle as it works, just like the store bought version if you've ever tried it! You can also use Cinnamon oil and a pinch of cayenne pepper for a super plump pout! This would be closer to the true lip venom product.  I just happen to prefer peppermint over cinnamon! 


Glitter Pumpkin!

Saturday, October 19, 2013


DIY Glitter Pumpkin!

Mix Modpodge with glitter(Martha Stewart offers the prettiest colors) and paint on with a paintbrush.  The glue will dry completely clear and it stays on securely, so you don't have to worry about glitter falling off!

Get Gorgeous with Coconut Oil!

Thursday, October 17, 2013


There are so many reasons to start incorporating Coconut Oil into your beauty routine!  

It is a natural anti bacterial(which I find amazing in itself), has incredible moisturizing properties, it's packed with antioxidants, smells great and has the ability to replace many of the other beautifying products you would typically buy. I just want to clarify that saving money is not the main reason your going to opt to switch your current products out for coconut oil, but the fact that it works so much better than what your already using and that it is 100 percent natural!(By the way this information is coming from a reformed..... ok somewhat reformed product junkie!) Many cosmetic and beauty products do contain some percent of coconut oil, so why not eliminate all the potentially harmful ingredients and convert to pure coconut oil?   I discovered coconut oil when I was pregnant with my daughter Emily.  I was in search of a serious moisturizer to aid in preventing stretch marks but at no cost to the baby. In the process I was amazed to learn about the countless other uses it provides.  My beauty routine is now completely focused around Coconut Oil and here is my Get Gorgeous Guide!

First you'll need to buy some Coconut Oil!  I buy mine in the organic section where I food shop. I prefer the brand Nutiva.  It is great quality and offers a pleasant scent.  

1. In place of Face Wash!
Coconut Oil is a natural antibacterial which makes it a powerful acne fighting component.  I know what your thinking.  The fact that it's oil you can't imagine how it could benefit acne prone skin but trust me on this one.  You just have to try it.  My skin has a tendency to breakout here and there. Nothing major but it seems to be especially worse when I am expecting.  I started using it in replace of face wash on my not so glowing pregnancy skin and I was so surprised at the results!  My skin was breakout free within a week or so and very well moisturized. I continue to use it today because I love it.  Once a week I mix in a tiny bit of baking soda to make it exfoliating.  To cleanse your face with coconut oil all you need to do is take a small dab (about the size of a pencil eraser) and rub it into you skin.  Rinse well and your done. 

2.A Super Efficient Eye Makeup remover!
Glide on some coconut oil to efficiently remove all traces of eye makeup.

3Get Fuller Lashes!
Before you go to sleep apply a thin layer of coconut oil to your lashes using a clean dry mascara wand.
Wash off in the morning.  This is thought to work by increasing the health of your lashes by nourishing them and preventing fall out.  

4.Heavy Duty Eye Cream!
Combine Coconut Oil with Vitamin E (Cut open the vitamin capsules) for a serious eye cream at less than half the cost of the store bought version.  

5Oil Pulling! 
Oil pulling is a process of basically swishing a high quality oil around in your mouth(like you would with mouthwash) with the objective to detox and rejuvenate.  Coconut oil contains lauric acid which makes it a natural anti bacterial, anti microbial and anti fungal. The process is said to remove toxins and will kill any harmful bacteria.  If your interested in trying this take anywhere from a teaspoon to a tablespoon of coconut oil and swish it around in your mouth for 5-20 minutes. Then spit it out and rinse well with water. Follow by flossing and brushing.  The benefits are super shiny clean teeth, strengthened gums, naturally whiter teeth, and improved overall oral health.  Similar to replacing face wash with coconut oil you are going to have to try it for yourself. There are some claims that it acts as a decongestant as well and helps to prevent and improve gingivitis.  This is recommended to do each day but at least aim for a few times a week.

5Lip Exfoliant!      
For super smooth lips gently rub them with a mixture of coconut oil and sugar.  Rinse and apply your favorite lip balm.

6DIY Lip Balm!
Make your own natural  lip balm by melting coconut oil and natural beeswax together with a few drops of vanilla extract or your favorite essential oil.  You can add a tiny bit of eyeshadow powder if you'd prefer some color! Store in a mini altoids tin.
I plan on doing a post about this soon with some suggestions.  

7Clean your makeup brushes! 
 Clean and sanitize your makeup brushes with melted coconut oil.

8 DIY Sugar Scrub!
Combine Coconut oil and sugar with the addition of vanilla extract or your favorite essential oil for a super moisturizing scrub.   

9 Replace your shaving cream!
 Trade out your shaving cream for coconut oil for amazingly silky legs.
You can also add coconut oil to your daily moisturizer to give it a boost. It can also be used to clear yeast related skin conditions as well as eczema.


 10 Prevent Stretch Marks
This is indefinitely the best way to prevent stretch marks that I have found.  Apply a generous amount after taking a shower in the morning and reapply nightly.  Do this every single day of your pregnancy in order to completely avoid stretch marks or at the least deeply impact the severity of them.(There are other factors involved)For the best stretch mark preventative tips I have to offer click below!


http://emilykateg.blogspot.com/2013/10/beauty-tip-number-one-stretch-mark.html


DIY Botox Face Mask!

Monday, September 30, 2013


Dr. Oz's DIY Natural Botox Face Mask!

This is a DIY Anti aging mask that is said to be a natural alternative to Botox.  Realistically, I doubt that results of this mask are quite equal to the results that you would achieve through Botox, but regardless it is a really good mask.  It is very moisturizing and will leave your skin glowing without any harmful side effects. 

Ingredients   
Half of a banana (The riper the better)
1/4 cup organic yogurt
1 Tsp High Quality Honey

Why It works: The lactic acid in the yogurt exfoliates while the honey moisturizes.

Instructions 

 Put all your ingredients in a bowl and use a fork or whisk to combine all of the ingredients. Apply to cleansed skin and keep on for 15 minutes.  Rinse thoroughly.  Admire your new healthy complexion that you achieved minus the risk of any harmful chemicals!

An added tip: Before applying the mask put a washcloth soaked in warm water on your face for 3 minutes to open your pores and prep for the mask. I also suggest using a good quality micro needle roller prior to applying the mask if you own one.(This makes a big difference)  If you are interested in purchasing as well as learning more about micro needle rollers check out this site Age Revolt .  After removing the mask quickly go over your face with an ice cube this is believed to help tighten your pores.


Pink Chairs!

Monday, September 9, 2013

This is a super easy DIY project.  I had these chairs already so I only had to purchase spray paint.  I used Rustoleums Berry Gloss.  I found my inspiration to paint these chairs on pinterest. I had plans to find a bench at a flea market, but then it occured to me that I could use these chairs that I stole already owned. My parents lent us this set to use in the back yard for one of the kid's birthday parties and they kind of just became mine because they never took them back ..lol  There are two others chairs and a small rod iron table that matches also but I kept them their original color a light metallic gold. I think my mom painted them previously, anyway here is the picture that inspired these fab chairs!


Framed Peacock feathers

Wednesday, September 4, 2013


Peacock feathers feature such a gorgeous combination of colors. This is a really simple DIY way to add some art to your walls. All you need is 5,  4 X 6 frames and mini peacock feathers.  I purchased my frames in a set from Target.  I found the peacock feathers  Here on Etsy.(They only cost 6$!) She also offers a wide variety of colors and sizes in her shop.  I foresee a blush pink inspired feather project in the future!  I came about this idea as a temporary way to fill the frames while I was trying to decide what pictures to use in them and decided to keep the feathers because I really ended up loving it.


Feel free to leave a comment and share any ways you've incorporated peacock feathers into your decor.  I could use some more ideas!

DIY Menu Board


DIY Menu Board!


Having a Menu board is a great way to organize your meals for the week!  I like to plan my meals out in advance for the week depending upon whats on sale and coupons etc. I find it saves money as well as time.  I like that I don't have to worry about what to make the day of because life can be pretty busy with work and  3 kids and I have a tendency to be a little indeciesive. 

If you would like to make one for your home all you will need is a Pretty frame that measure 16 X 20 and a mounting board.  I purchased both at Hobby Lobby.  Here are the links.


Mounting Board


I haven't hung mine up on the wall yet but when I do I will post another picture. There is also a shiny black frame on the website that would be gorgeous. I would have purchased the black frame but I have a small gallery wall that I use to hang up the kids art using glossy black frames so I wanted to choose something different for this project.

Kate Spade Inspired Canvas


When I saw this piece of DIY art on pinterest I instantly fell in love.  I love DIY projects, especially home decor related crafts.  This is super easy to make and you don''t need many supplies. 
My Tutorial is inspired by this one at JaderBomb I came across on pinterest. 
You will need:
A square 12 x 12 white canvas
A circle punch(Otherwise you will need to trace and cut out your circles)
I used Rustoleum's Gold Metallic Spray paint sprayed on white scrapbook paper. 
I also used Martha Stewart's fine glitter(Florentine gold, and Smoky Quartz) mixed with modpodge painted on white cardstock to create the glittery dots. 
 I bought a big Gold Metallic sheet of scrapbook paper(from Hobby Lobby) for the super shiny circles.  

I'm sure you can modify the supplies and use what you have from your own craft collection. 
 I saw that some people bought glittery scrapbook paper, and used that.  I love the way mine turned out though.  I am obsessed with Martha Stewart glitter.(It is soo pretty.)
I also think that Rustoleum Gold Metallic is the perfect shade of gold paint.  I think that the gold metallic dots(I didn't use as many) really completed the look, but I felt that if all of them were done in the metallic it would be overwhelming and might look funny when light hit at certain angles.   I like the mix of the different shades of gold together.    I also made a large version of this using a 24 x 30 white canvas.  I hung them both up in the same room on separate walls.  I have this in my family room but I could see it in a bedroom, office or even a dining area. 
I cut out all my circles then placed them where I wanted.  I then proceeded to glue each dot down in place using modpodge and a small paintbrush.  The tutorial I linked used a glue gun which would probably be much easier, but I don't own one so I used what I had.  Now your done its as simple as that, all that's left to do is hang it up! Enjoy your fabulous new wall art.
The circle punch is also amazing for creating super cute confetti. You could use gold paper for some Kate Spade inspired confetti! I'm pretty sure they actually do sell that, or multicolor tissue paper for kids birthday parties would be really fun. 
Related Posts Plugin for WordPress, Blogger...
 
site design by designer blogs